A Twitter Web Tag is a piece of HTML that you implement in your website to enable measuring the results of your Promoted Tweets.
Creating a tag takes just a few minutes. So what do you need to do?
- First go to the Twitter Ad panel: https://ads.twitter.com
- If you have access to a few ad accounts, select the one that you want to create campaigns with.
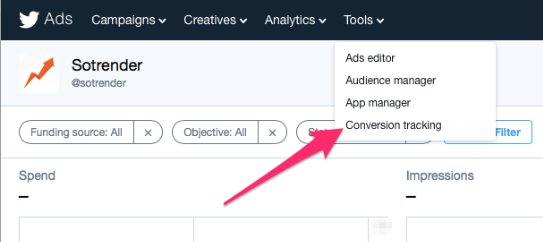
- Click Tools at the top of the panel and select ‘Conversion Tracking’.

- Next click on ‘Create new conversion event’.
- Add a custom name, select what type of conversion you want to track, and set post-view and post-click attribution windows, agree to Twitter policy and hit ‘Save conversion event’.

- Your tag is ready!
Now you have to download the snippet code and place it at the bottom of every page on your website before the </body> HTML tag.
How to know that your tag is placed correctly and it’s able to collect data?
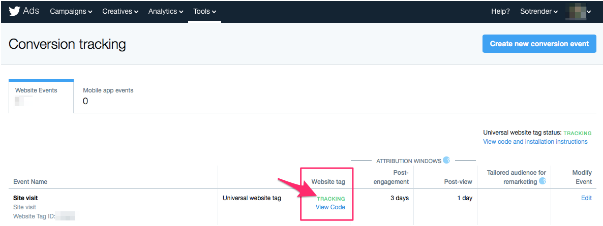
- Next to every tag, Twitter shows you this status:

- You can also install a Chrome extension (https://chrome.google.com/webstore/detail/twitter-pixel-helper/jepminnlebllinfmkhfbkpckogoiefpd) that shows you how many pixels were found on a specific page, if they’ve encoured any problems, and how to solve them:


